Designing a 3D Printed Ant Moat
We recently moved our cats’ feeding area to a room right next to an exterior door. Within a few days, their wet food started attracting ants. At first, we wanted to handle it as humanely as possible. We tried sealing entry points, cleaning thoroughly, and avoiding harsh chemicals since the bowls sit right where my cats eat. Reluctantly, I eventually tried Antrid, which worked briefly, but the ants kept coming back.
Then I remembered something from childhood. My grandma used to keep her sugar jar sitting inside a shallow bowl of water. The ants could reach the bowl but they could never cross the water. That memory stuck. Instead of repeatedly reacting to the ants, I decided to create a barrier.
Then I thought surely this must be a thing and started searching for existing designs for this idea. There were quite a few interesting designs but nothing quite fit what I had in mind. Most solutions were either too bulky, poorly designed, or not something I’d want sitting in the room. So I decided to build it myself. I designed a moat.
The Concept
The idea is simple:
- An outer circular wall to hold water
- A raised inner platform to hold the bowl
- Enough capacity of water so that it won’t evaporate quickly
- A gap between the platform and outer wall filled with water
- Ants can approach - but they cannot cross the water
It’s a physical boundary rather than an ongoing treatment. Simple physics instead of escalation.
Iteration 1
Design goals:
- Stable base
- Strong internal support
- Easy to print without supports
- Thick enough walls to hold water reliably
- Enough water capacity to last for a few days without evaporating
The first version used radial triangular supports to hold up the central platform. The geometry distributes weight evenly and prints cleanly. I kept the walls reasonably thick and printed solid (no infill) to reduce the chance of warping or leaking.
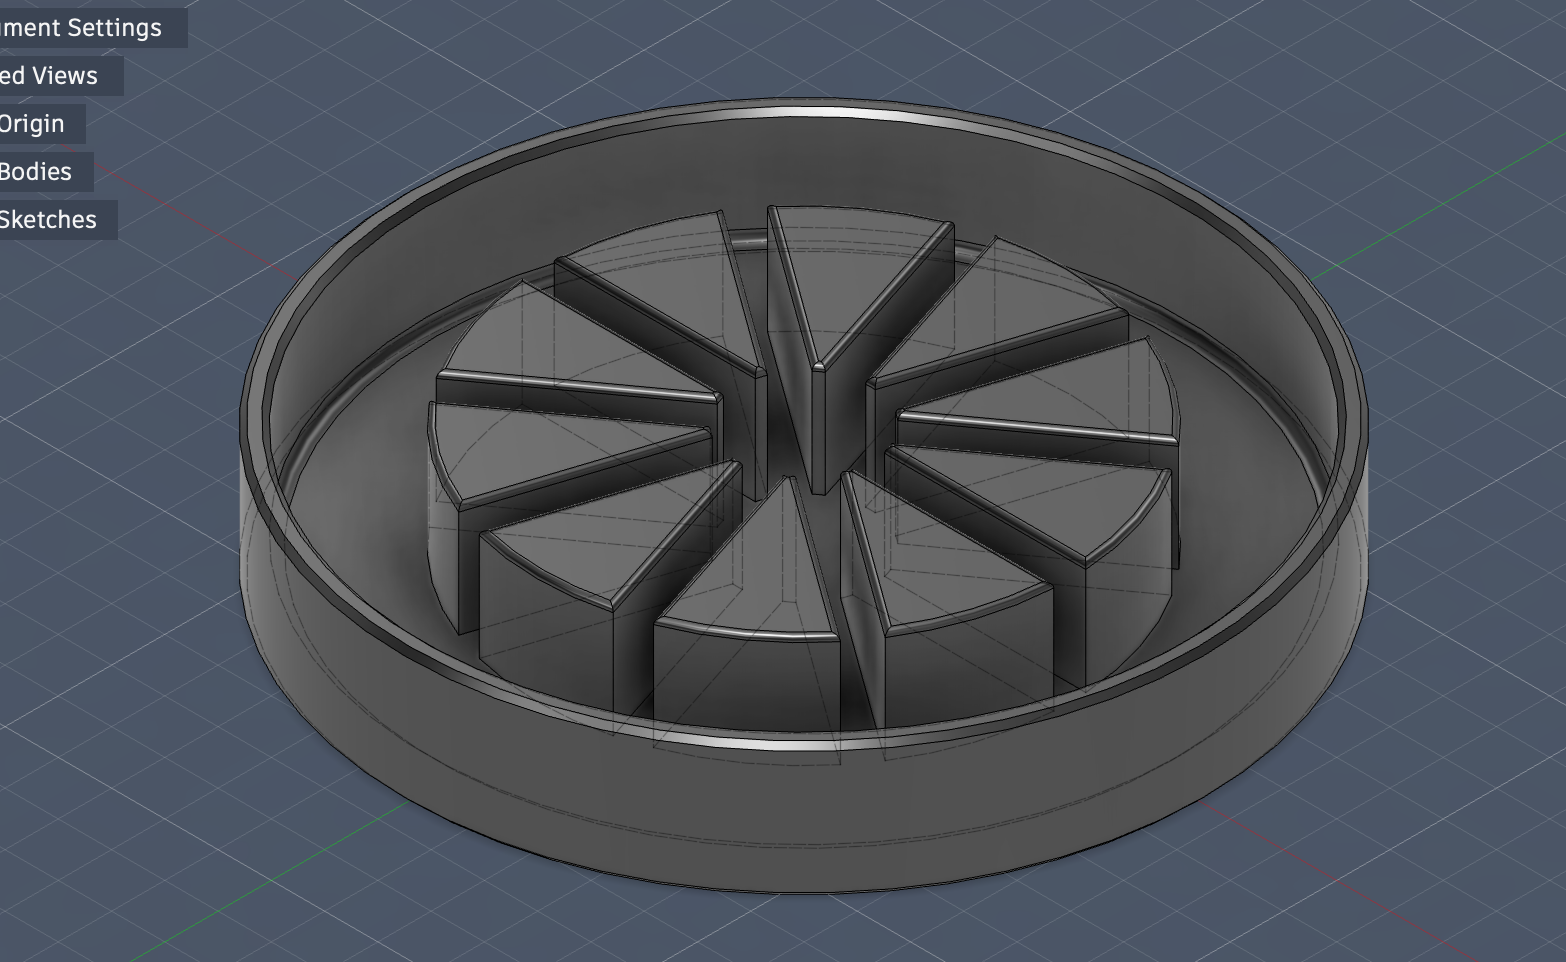
Iteration 1 CAD Render
It did not work as expected. The central platform was too low and couldn’t fit the food bowls that we were using.
Iteration 2
Design goals
- The internal supports were functional but not tall enough and visually heavy
- The gap between the food bowl’s edge to the outer wall of the moat was too narrow (maybe ants could jump)
- Cleaning could be easier
- Print time could be reduced.
So I refined the internal structure and also modeled it much more easily with a simple ‘revolve’ operation. The goal was to make the design lighter, cleaner, and more intentional. Version 2 feels more deliberate. Less brute-force. More considered. And it prints faster.

Iteration 2 CAD Render
Reflections
There’s something satisfying about solving small, real-world problems with design. This project reminded me of a few things:
- Old wisdom still works
- Iteration + experience is how we improve
- The first version is rarely the best version
- Constraints force creativity
I started thinking about version 3; however, some wise person said it is more important to know when it is good enough. The next iteration will not improve my design as much as from v1 to v2, so it’s a matter of diminishing returns.
Having said that, these are the thoughts that came to my mind: better geometry (hexagonal), cleaner aesthetics, hexagonal shape, and the ability to attach a few of them together to build a wider base.
Design is never finished - it just evolves.